Dell XPS 13 SSD upgrade
In July I replaced my Lenovo ThinkPad x240 with a Dell XPS 13 9370 I impulse bought from the reduced section of John Lewis. Last week I finally got around to installing the new SSD I bought in a Black Friday deal on-line.
Background
My Dell XPS 13 9370 came with a respectable 16GB RAM and 512GB SSD, and I had not intended to upgrade either of these and sticking with the installed Windows 10, however I was tempted by a very good offer on a 2TB SSD and irritated by some of the limitations of the Windows Subsystem for Linux(WSL).
My main issues with WSL are file-permissions getting screwed up between editing on Windows and tools running under WSL, e.g. Git, poor network device support making trusty tools like nmap not work and the lack of support in the emulated kernel for thinks like LUKS and FUSE. In short, although a vast improvement on previous efforts to bring Linux tools to Windows many of the things I use every-day still don’t work.
Coupled with having nearly filled the 512GB disk with most of the stuff from my old laptop, my desire to dual boot with Linux again was now contingent on either sorting out my data or increasing the amount of space.
Copying the old disk
Unfortunately I neither possess nor currently could afford a USB caddy for the old SSD, which is a “M key” keyed device. I do, however, have a caddy containing the 512GB “B key” SSD I used in my old ThinkPad. Reformatting it, I was then able to robocopy all of my data from the existing disk to this one.
I wanted to be sure I would be able to boot off my Windows 10 installer USB memory stick, via a USB-A to USB-C adapter (as the Dell only has USB-C), so I was going through the “Advanced start-up” options (which are under “Recovery”, which is under “Updates and Security” in the Windows Settings (née Control Panel), counter-intuitively) to try and make this thing boot from something other than the hard-disk.
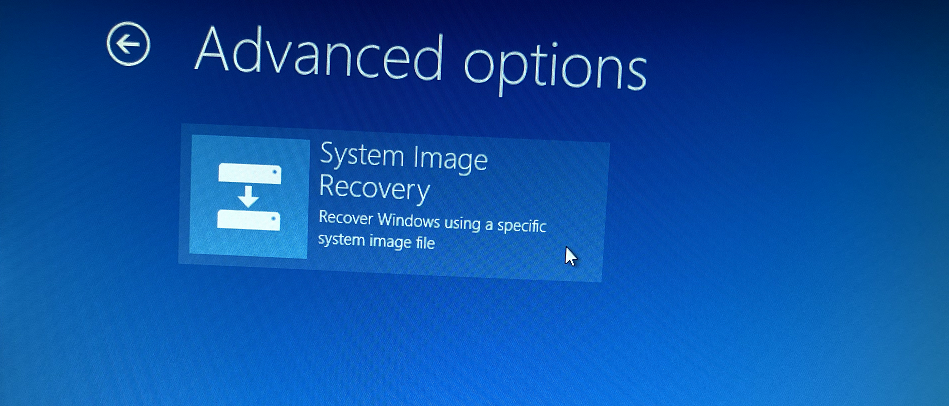
This was the point I discovered there was an option “System Image Recovery”, although like much of the excellent tools I used that Microsoft have provided it was very well buried (after choosing “Restart now” under “Advanced start-up”) under “Troubleshoot”, “Advanced options”, “See more recovery options”:
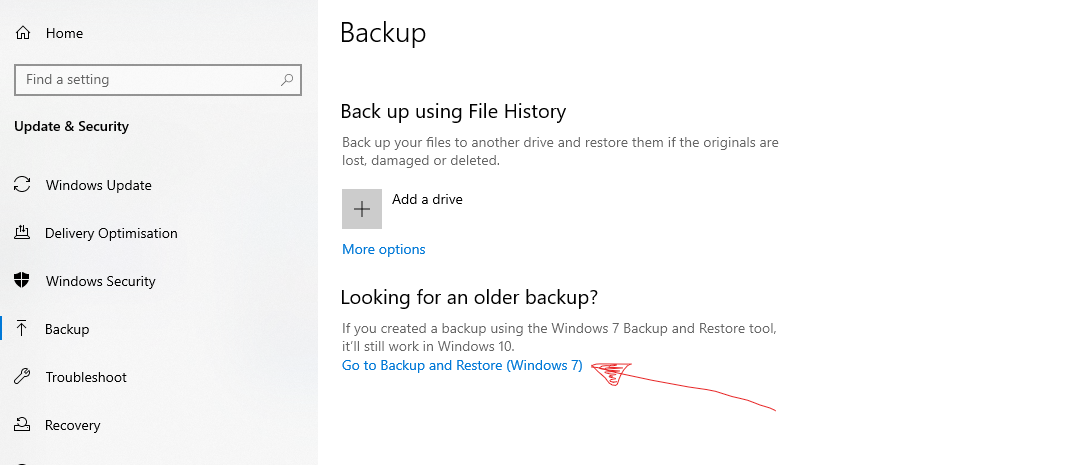
So how does one create an image to restore onto the new disk? Well, that’s even more hidden to get to that I had to go to Settings, “Updates and Security”, “Backup”, “Go to Backup and Restore (Windows 7)” and then “Create a system image”:
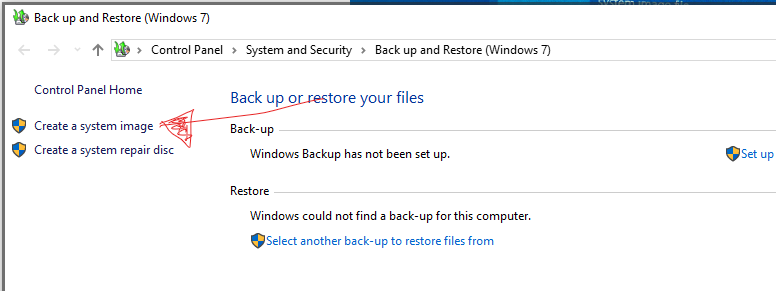
I put the image onto the SSD from the ThinkPad (deleting the robocopy I’d spent a full day creating!) and it also gave me the option to create a rescue CD as well, which I did (never did find the option to boot from USB). Creating the image only took about 20 minutes, despite ending up with a 300GB image file.
The Upgrade
Swapping the SSD was straight-forward enough. More-or-less directly following a guide I found on iFixit; the only differences being my laptop does not have a flap in the middle, I needed a T6 (not T5) screwdriver for the base screws and it took me 18 minutes, not the 15 promised (I timed it with a stop-watch).
Restoring from the old disk image
Restoring, I just booted off my recover CD I’d created earlier and the recovery process happily recovered from the system image while I was out at my wife’s boxing club’s Christmas party. And it all just-worked afterwards - everything! First time!
Conclusion
All in all, it probably took about 30 minutes of my time, most of which was swapping the SSDs over, to do this upgrade. I think this is a new personal best for upgrading the disk. Getting the system image to work, thus avoiding the usually jiggery-pokery with either a full re-install or imaging using some 3rd party tool and much fun and games getting Windows to boot again afterwards.
I still need to sort out my data, and my plan is to create a huge 1TB partition to dump it all in, in one big heap, and then sort it. I have not yet thought of/found an acceptable way to share this partition between Windows and Linux and have it encrypted.
One idea I have had is to use VeraCrypt (forked from TrueCrypt) to encrypt the partition but I will then probably have to use NTFS as a highest-common-denominator file-system which is not ideal from the Linux end.
More thought required on this one.
I also will have to switch the SSD from “Intel RAID” mode to “AHCI” in order for Linux to see it, however this requires jumping through some more hoops with Windows (which will be another blog post I’m sure) in order for it to continue functioning. I did try doing this before restoring the system image, however it seems (not surprisingly) the controller driver seems to be baked in and the restored image would not boot until I switched it back again.